Homemade bread has captured the hearts of home cooks for centuries, offering a satisfying and rewarding experience. This guide explores every aspect of creating bread at home, from choosing the right ingredients to mastering advanced techniques. Whether you’re a novice baker or looking to expand your skills, this guide will make the process enjoyable and accessible.
Introduction to Homemade Bread
Homemade bread is not just a recipe; it’s a skill that connects us with culinary traditions and provides a sense of accomplishment. Baking bread at home allows complete control over the ingredients, resulting in healthier and tastier loaves.
Why Choose Homemade Bread?
- Quality: Store-bought bread often contains preservatives and additives.
- Cost-effectiveness: Making your own bread can save money over time.
- Customizability: Adjust flavors, textures, and even shapes to your liking.
A Brief History of Breadmaking
Bread has been a staple food for thousands of years. From simple flatbreads to the refined loaves of today, the art of breadmaking reflects the evolution of human culture and innovation.
Essential Ingredients for Homemade Bread
Creating perfect homemade bread begins with understanding its foundational ingredients. While recipes vary, the essential elements remain consistent.
Flour: The Backbone of Bread
- All-purpose flour: Ideal for most bread types.
- Bread flour: Contains more protein, creating a chewier texture.
- Whole wheat flour: Adds a nutty flavor and higher nutritional content.
Yeast: The Rising Agent
Yeast is crucial for fermentation and creating airy bread. Options include:
- Active dry yeast: Requires activation in water.
- Instant yeast: Can be mixed directly with flour.
- Natural starters: Used for sourdough bread.
Other Key Ingredients
- Water: Determines dough consistency and hydration.
- Salt: Enhances flavor and strengthens gluten.
- Optional add-ins: Seeds, herbs, and spices for creativity.
Essential Tools for Making Homemade Bread
Investing in the right tools simplifies the breadmaking process and improves results. While many recipes can be made with basic equipment, having specialized tools enhances precision.
Basic Tools
- Mixing bowls: Essential for combining ingredients.
- Measuring cups and spoons: Ensures accuracy in recipes.
- Wooden spoons: Durable and easy to clean.
Specialized Equipment
- Dough scraper: Helps with shaping and transferring dough.
- Bench knife: Cuts dough cleanly without tearing.
- Baking stone or steel: Provides even heat distribution for a crisp crust.
Types of Homemade Bread
Exploring different types of bread broadens your baking repertoire and offers unique challenges.
Classic Loaves
- White sandwich bread: Soft and perfect for everyday use.
- Whole wheat bread: Nutritious and flavorful.
Artisan Breads
- Sourdough: Requires a natural starter for its signature tang.
- Ciabatta: Characterized by an airy crumb and chewy crust.
Specialty Breads
- Flatbreads: Easy to make and versatile.
- Focaccia: Rich and perfect for experimenting with toppings.
Step-by-Step Guide to Making Homemade Bread
Mastering the art of homemade bread involves several detailed steps, each of which contributes significantly to the quality of the final loaf. By following these steps carefully, you can ensure consistent results and delicious bread every time.
1. Preparing Ingredients
Proper preparation is the foundation of successful breadmaking. Begin by measuring all your ingredients accurately. Even small discrepancies can affect the texture and flavor of the bread. A kitchen scale is highly recommended for precision, especially when working with flour.
Ensure that your ingredients are at room temperature, as this promotes better mixing and yeast activation. For example, warm water (around 100°F or 37°C) helps activate yeast effectively, while cold water can slow down the process. If your recipe calls for add-ins like seeds, herbs, or dried fruits, prepare them in advance to streamline the process.
2. Mixing and Kneading
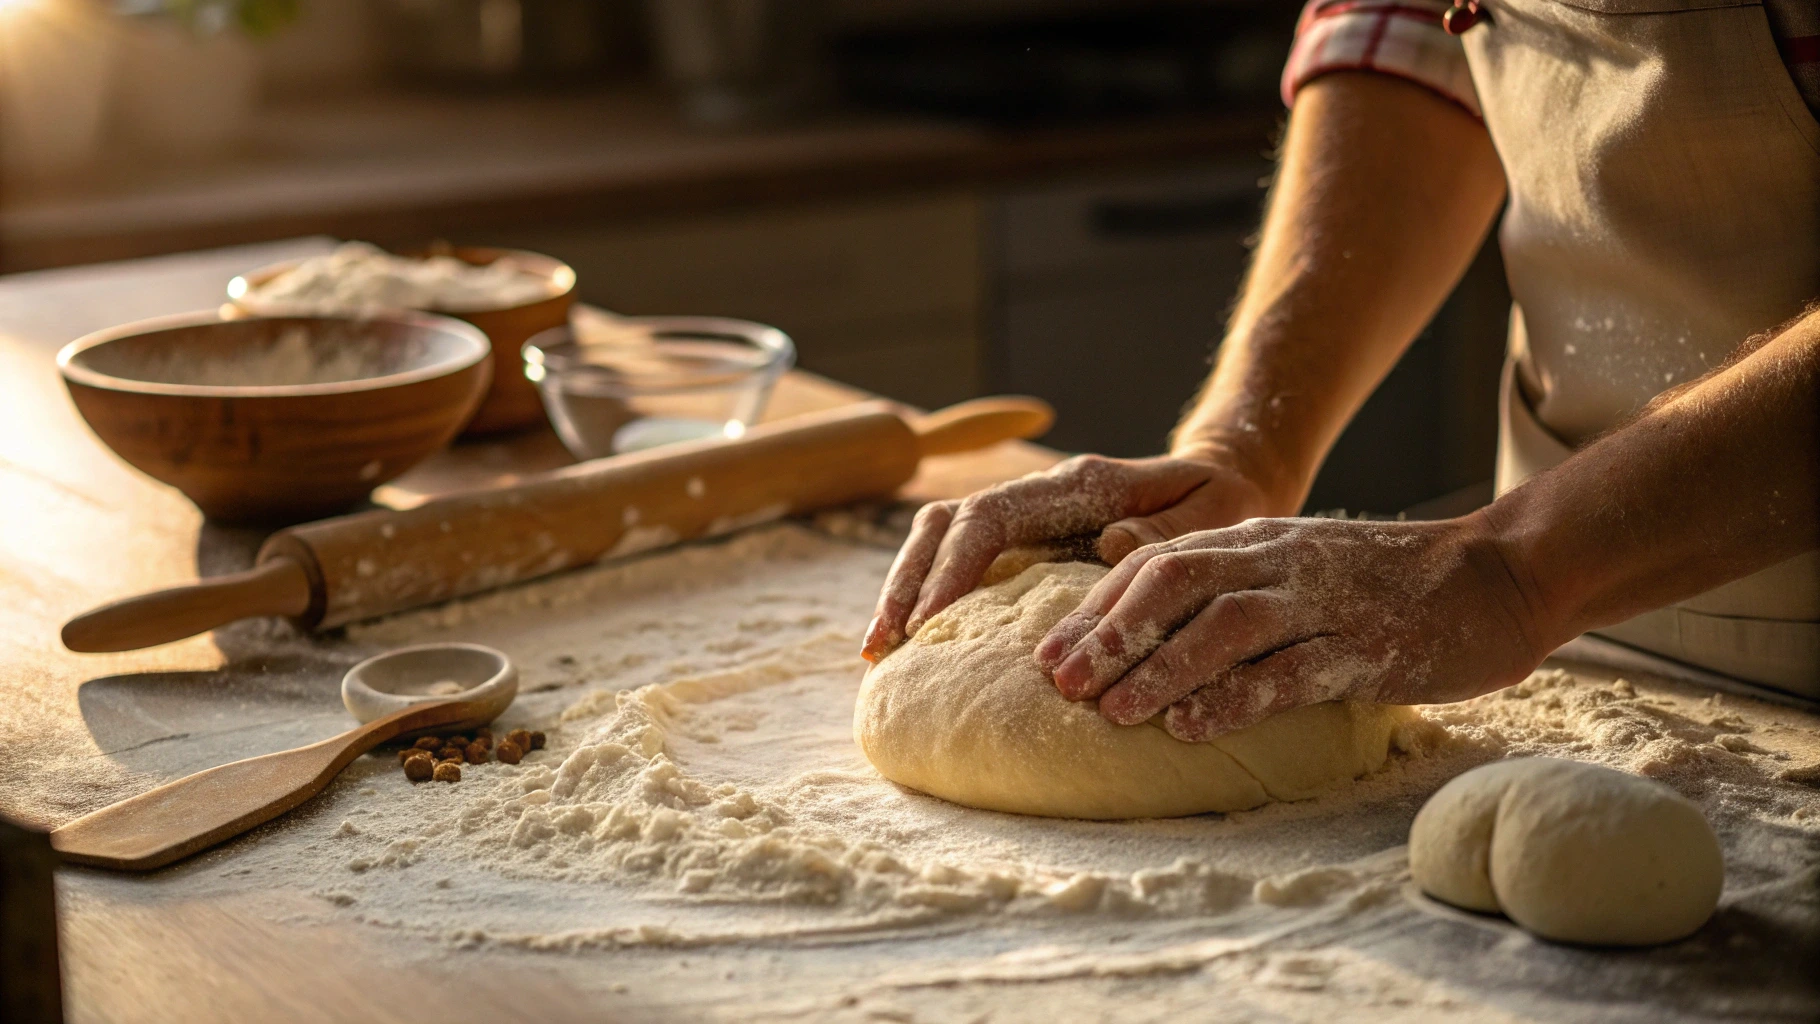
Mixing and kneading are crucial steps in developing the dough’s structure. Start by combining dry ingredients like flour, yeast, and salt in a mixing bowl. Gradually add wet ingredients, such as water or milk, and mix until the dough begins to form. Once combined, transfer the dough to a lightly floured surface for kneading.
Kneading helps develop gluten, the protein network responsible for the bread’s elasticity and chewiness. Use the “push, fold, and turn” method: push the dough with the heel of your hand, fold it over, and turn it 90 degrees. Repeat this process for about 8–10 minutes until the dough becomes smooth and elastic. If using a stand mixer, knead with a dough hook on low speed for about 5–7 minutes.

3. Proofing
Proofing, also known as fermentation, is the process where the dough rises and develops flavor. Place the kneaded dough in a lightly oiled bowl, cover it with a damp cloth or plastic wrap, and set it in a warm, draft-free location. Ideal proofing temperatures range from 75°F to 85°F (24°C to 29°C).
Allow the dough to double in size, which typically takes 1–2 hours depending on the recipe and room conditions. To test if the dough is properly proofed, gently press it with your finger. If the indentation springs back slowly, it’s ready for the next step. If it springs back quickly, it needs more time.
4. Shaping
Shaping the dough gives your bread its final form and influences its texture. Gently punch down the dough to release excess air, then transfer it to a clean surface. Depending on the type of bread, divide the dough into portions if needed.
Shape the dough by folding and rolling it into the desired shape, whether it’s a round boule, a long baguette, or a rectangular loaf. For softer breads like sandwich loaves, place the shaped dough into a greased or parchment-lined pan. For rustic or artisan loaves, shape the dough and place it on a baking sheet or in a proofing basket for a final rise.
5. Baking
Baking is the final step that transforms your dough into a beautifully golden loaf. Preheat the oven to the temperature specified in your recipe, usually between 375°F and 450°F (190°C to 230°C). Proper preheating ensures even baking and a good rise in the oven.
If your recipe calls for steam, place a pan of water on the bottom rack or spray water into the oven just before baking. Steam helps create a crisp, golden crust. Bake the bread until the crust is firm and golden brown, and the internal temperature reaches about 190°F (88°C) for soft bread or 205°F (96°C) for crusty bread.
Once baked, remove the bread from the oven and let it cool on a wire rack. Cooling is essential, as it allows the interior to set fully and prevents a gummy texture. Resist the temptation to slice the bread while it’s still warm, as this can compromise the texture.
By following these steps with care and attention to detail, you can confidently create homemade bread that is both delicious and visually appealing. Each phase contributes to the overall success of your loaf, making it a truly rewarding experience.
Common Homemade Bread Mistakes and How to Fix Them
Even experienced bakers encounter challenges. Understanding common pitfalls helps you create better bread.
Overproofing or Underproofing Dough
Solution: Use a timer and observe visual cues like dough doubling in size.
Dense or Heavy Bread
Solution: Ensure proper kneading to develop sufficient gluten.
Uneven Baking
Solution: Rotate the loaf halfway through baking for even heat distribution.
Health Benefits of Homemade Bread
Homemade bread provides a wide range of health advantages that set it apart from store-bought alternatives. From nutritional improvements to psychological well-being, baking your own bread offers benefits that go beyond simply satisfying hunger. The ability to control ingredients and the joy of creating something from scratch make homemade bread a healthier, more fulfilling option.
Nutritional Benefits
One of the most significant health benefits of homemade bread is the absence of preservatives and artificial additives, which are commonly found in commercially produced bread to extend shelf life. Homemade bread allows you to use natural and wholesome ingredients, ensuring a cleaner and healthier product.
Additionally, you have complete control over sugar and salt content. Many store-bought loaves contain high levels of both, which can contribute to health issues like high blood pressure or excess calorie consumption. By baking your own bread, you can adjust these levels to suit dietary needs or personal preferences.
Homemade bread also makes it easy to incorporate whole grains, seeds, or nuts into your recipes. These ingredients are rich in essential nutrients like fiber, protein, vitamins, and minerals. Fiber, in particular, supports digestive health and helps maintain a feeling of fullness, reducing overeating. For those with dietary restrictions or allergies, homemade bread provides an opportunity to create gluten-free or allergen-free loaves tailored to specific needs.
Psychological Benefits
Beyond its nutritional advantages, baking bread has psychological benefits that contribute to overall well-being. The act of measuring, kneading, and shaping dough can be a deeply calming and therapeutic activity. Many find that engaging in this hands-on process helps reduce stress and anxiety, promoting mindfulness and focus.
Baking bread is also rewarding, offering a sense of accomplishment and pride in creating something tangible. Sharing homemade bread with family or friends strengthens social bonds and fosters feelings of connection. Moreover, the aroma of freshly baked bread has been shown to elevate mood and create a warm, inviting atmosphere at home.
Whether you’re looking to improve your diet or enhance your mental health, homemade bread offers a unique combination of benefits that make it a valuable addition to your routine. The process of baking and enjoying your own bread not only nourishes the body but also nurtures the mind and soul.ty.
Creative Homemade Bread Recipes to Experiment With
Baking bread at home unlocks endless possibilities for experimentation.
Adding Flavors
- Infuse the dough with garlic, herbs, or cheese.
- Incorporate dried fruits and nuts for sweetness.
Exploring Shapes
- Try braiding challah for a stunning presentation.
- Shape rolls for convenient portion sizes.
Storing and Freezing Homemade Bread
Proper storage ensures your homemade bread remains fresh and delicious, maintaining its texture and flavor over time. Whether you’re storing bread for a few days or planning for long-term use, using the right methods is essential to avoid dryness or staleness.
Short-Term Storage
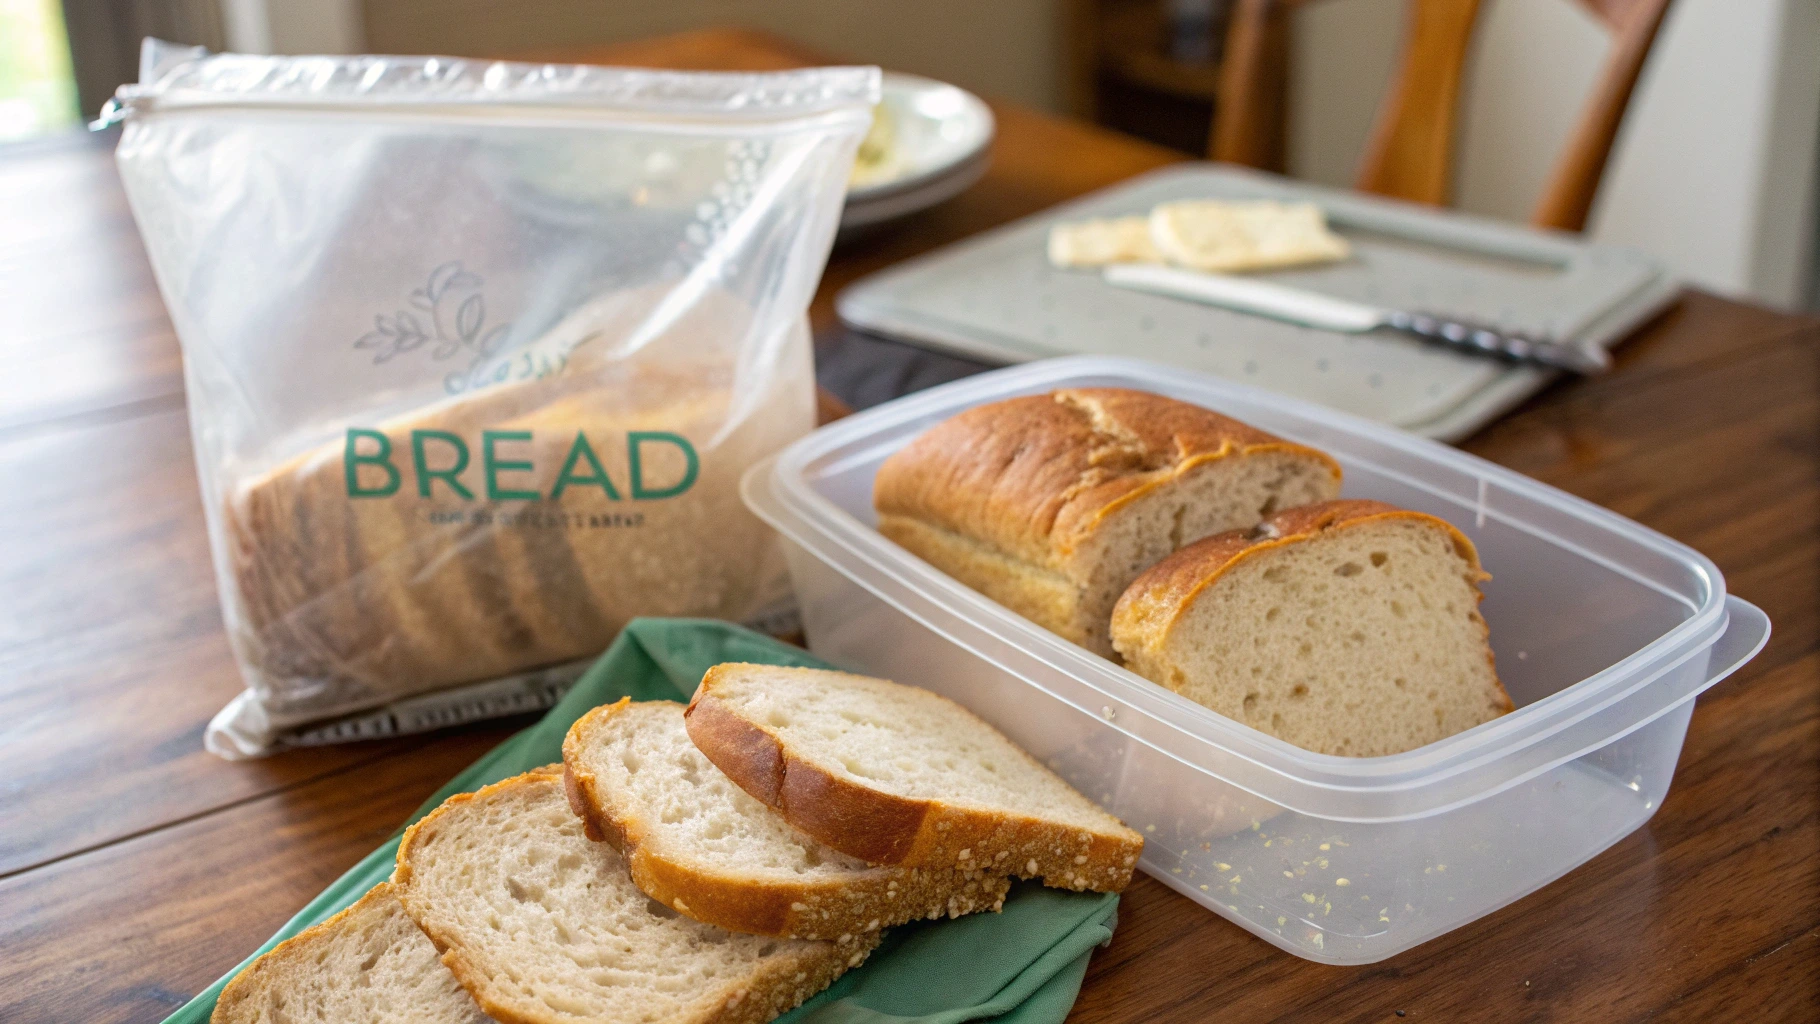
For short-term storage, keep your bread at room temperature in a sealed container, such as a bread box, airtight plastic bag, or resealable storage bag. Ensure the bread is fully cooled before storing to prevent condensation, which can lead to mold growth. A cloth bag is another excellent option for artisan or crusty loaves, as it allows airflow while protecting the bread’s crust.
To preserve freshness for up to three days, store the container in a cool, dry area away from direct sunlight. Avoid refrigerating bread, as this accelerates staling by drawing moisture out of the loaf. If your bread starts to feel slightly stale, toasting it can help restore some of its original texture and flavor.
Long-Term Storage
For long-term storage, freezing bread is the most effective method. Slice the bread beforehand to make thawing easier and more convenient. Place individual slices or whole loaves in airtight freezer bags or wrap them tightly in plastic wrap followed by aluminum foil to prevent freezer burn. Removing as much air as possible from the packaging ensures optimal preservation.
Frozen bread can be stored for up to three months without significant quality loss. When ready to use, thaw the slices at room temperature or warm them directly in an oven at 350°F (175°C) for about 10 minutes. This reheating process restores the bread’s softness and enhances its aroma. For those who own a toaster, frozen slices can go directly into the appliance for quick and easy preparation.
By carefully storing and freezing your bread, you can enjoy the taste and quality of homemade bread whenever you like, without worrying about waste.

FAQs About Homemade Bread: Secrets, Tips, and Benefits
What is the secret to making homemade bread?
The secret to making perfect homemade bread lies in precision, patience, and technique. Start with high-quality ingredients like bread flour and fresh yeast. Accurately measure each component to ensure consistency. Proper kneading develops gluten, giving your bread its structure, while proofing at the right temperature enhances flavor and texture. Additionally, baking with steam helps achieve a golden, crispy crust.
Is it cheaper to make your own bread?
Yes, making your own bread is generally more cost-effective. The basic ingredients like flour, yeast, and water are inexpensive compared to buying store-bought loaves. While there may be initial costs for tools or equipment, these are one-time investments. Over time, baking bread at home saves money and allows you to make larger quantities for the same price as a single loaf from the store.
Is homemade bread really healthier?
Homemade bread is significantly healthier than many store-bought options. It contains no preservatives, artificial additives, or high levels of sodium and sugar. You have full control over the ingredients, allowing you to use whole grains, seeds, and less processed flours. Additionally, homemade bread often has fewer calories and more nutrients compared to commercially prepared alternatives.
What ingredients are used to make bread?
Bread requires only a few essential ingredients:
- Flour: The main component, providing structure.
- Water: Necessary for hydration and dough formation.
- Yeast: Helps the bread rise by creating air pockets.
- Salt: Enhances flavor and strengthens gluten.
Optional ingredients like sugar, butter, eggs, and seeds can add flavor and texture, depending on the recipe.
What’s the Best Flour for Homemade Bread?
Bread flour is the best choice for homemade bread due to its higher protein content, which develops gluten for a chewy and structured loaf. For healthier options, you can use whole wheat flour or mix it with all-purpose flour for balance. Specialty flours like rye, spelt, or gluten-free options are also great for specific types of bread.
Can I Make Bread Without Yeast?
Yes, you can make bread without yeast using alternatives like baking powder, baking soda, or natural leavening agents such as a sourdough starter. These options create different textures and flavors. For example, soda bread uses baking soda for a quick, dense loaf, while sourdough offers a tangy flavor from natural fermentation.
Why Does My Bread Have a Hard Crust?
A hard crust is often caused by overbaking or a lack of moisture during baking. To prevent this, bake your bread at the recommended temperature and monitor it closely. Adding steam to the oven, either by placing a pan of water on the bottom rack or misting the loaf with water before baking, helps achieve a softer, more desirable crust. Proper storage, such as wrapping the bread in a clean cloth or bag, also prevents it from becoming too hard over time.
By addressing these common questions, you’ll be better equipped to tackle the challenges of baking homemade bread, creating loaves that are delicious, cost-effective, and nutritious!
Conclusion
Homemade bread is more than a staple food; it’s a craft that brings joy and nourishment. With practice and patience, you’ll master the art and create loaves to be proud of. Start today, and enjoy the journey!


1 thought on “The Ultimate Guide to Homemade Bread: Healthier and Tastier at Home”